PHYSICAL DESIGN
PAPER-PROTOTYPING
Paper prototyping was an interesting and useful tool to quickly get objects out into the wild. It was difficult to find an appropriate method of testing for this product as the interaction itself is a familiar analogue switch but it is the context of the experience that is the essence of the artefact. For this it meant that I could conduct little to no testing in the comfortable controlled environment of the studio, I just had to get out and see how these types of experiences are received by the public.
The paper prototypes of the domestic interactions were installed in the urban landscape. The medium of cardboard is a very easy way of engaging the public with the concept. Initial tests of how people react to these familiar objects when they are placed in a new context resulted in a lot of anger, curious and trepidatious behaviour. While this is the expected experience I want the users to go through this is not conducive to early testing of the expectations of the reaction that the user wants once they have overcome the barrier of entry. I was interested to see what people thought had they just walked past this object. The method of building the objects gave me a interesting perspective on the inner workings of these everyday pieces of technology and started igniting ideas of how I could play upon the familiarity and the expectations of these things. The different reactions could make an interesting thought provoking experience for the user to re-examine everyday objects, and perhaps re-look at the city landscape and the inhabitants who’s homes are the streets.

Given the limitations of the cardboard I made a simple wall mounted light switch with could be easily placed at on or off. The objective of this test was also to examine how these objects might survive ‘in the wild’, would they be respected or quickly taken and disposed of. This was simply learnt through leaving the paper prototypes in situ for periods of time, lengthening the timespan with each session. Ultimately the goal is to leave the objects over night in spaces where rough sleeps are known to stay.

ELECTRONIC TESTING
I began testing the electronics that would be needed to run the artefacts by laying out simple circuits and researching appropriate components. I began with the standard Arduino board to rig up LED’s that I felt would be necessary to get the type of light that I needed to illuminate the artefacts in the correct way. The LED’s that come with the Arduino set were not bright enough for the effect I hoped to achieve so I had to experiment with more powerful 3V LED’s. I also had to consider the effect of the LED being contained in such a small unit, being close to the surface it was to illuminate. To control this I had to improvise with light dispersion and incorporating some piece that would help to spread the light evenly on the surface of the object. For this I used different plastics but the most successful was a half sphere which I got by cutting a ping pong ball in half.
Ultimately I ended up using the Leonard Micro Arduino, a Piezo, red LED, 2x 3V white LED’s, a transistor and 2R7 ohm resistor. There had to be a lot of consideration placed on how these components would be soldered together, the amount of wire needed and conservatively needed given the limited space that we were dealing with inside particularly TIRARE unit.

HIGH-FIDELITY PROTOTYPE BUILD
Into the delivery stage of this project, I focused on compiling all the material that had built up to this point, all the research, ideating and design methodologies to deliver a convincing line of products that brings a moment of awareness to the homeless crisis.
Building the physical units was an interesting process as I needed to recreate mass produced lighting fixtures in a clear resin in order to illuminate the tag LIGHT IS INSIDE from the inside of each device. Given that the tag referred to light this rendered the kettle object obsolete, as I believe it didn’t fit correctly into the series.
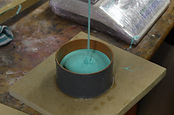
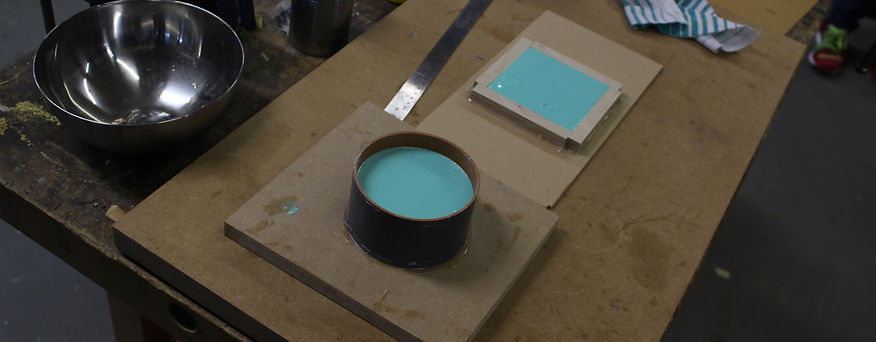
I order to create the wall mounted light switch I made a silicon mould of the bought unit and then pour resin into the mould to take make transparent casts. It took a number of tests before I became to get casts of the standard I wanted. The pull cord switch was a more difficult process as it needed to be a tow-part mould to capture both the exterior and interior of the bought unit. This was more complex, but ultimately it paid off as I was able to preserve the inner thread, which allowed me to screw the new cap into the existing switch.


MOULD MAKING

After the initial paper prototyping, I decided to make further artefacts covering the full range of products I hoped to develop.
Once paper prototypes were made I decided to take them out into the street for some user testing and to see the reactions these strange objects induced in passers-bys.
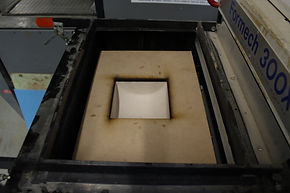
CASTING


FORM BUIDING